What is MIDI? Behind this term lies an innovation that has revolutionized the world of musical instruments. However, this designation can also evoke apprehension because what it encompasses remains largely unknown to most musicians. In this blog series, we will shed light on how MIDI works so that you'll never fear plugging in a MIDI cable again and can fully harness everything it offers for your musical creations.
Épisode 3 : What is a MIDI Program Change message (MIDI PC) ?
In this third article, we will explain in details what is a MIDI Program Change message (MIDI PC), what it is used for, and how to use it to record or save a preset with your Kernom pedal.
What are MIDI Program Change messages for?
As seen in Episode 1, the MIDI standard allows for the transmission of various types of messages, one of the most commonly used being the Program Change (MIDI PC). We will now explain what this type of message is used for.
To better understand what a Program Change is, let's use the example of a television and its remote control. A television offers multiple channels, each with unique content. The remote control allows us to remotely select the channel we want to watch. Each button on the remote control corresponds to a specific channel. Simply press the corresponding button to access the desired content... it's very simple.
With a MIDI Program Change (MIDI PC), it's the same idea. Replace the remote control with a MIDI switcher, and the television with a pedal equipped with presets and MIDI, both connected by a MIDI cable. On your pedal, you know that preset 2 corresponds to a clean boost sound, while preset 3 corresponds to a heavily saturated lead sound. To select the clean sound, press footswitch B on the MIDI switcher. It will send a program change n°2 to the pedal, which will automatically select the corresponding "clean boost" preset. And by pressing C, preset n°3 will be chosen for a cutting solo. It's not more complicated than that.
To resume, a MIDI Program Change message (MIDI PC) allows remotely selecting a specific preset on another device, either to recall or to save it.
Detailed Description
With the MIDI standard, you can directly select up to 128 program changes. It's like having 128 channel buttons on your remote control. This allows you to have up to 128 presets accessible instantly.
Setup for Use
To use a program change, start by connecting the MIDI OUT output of the device that will send the message (a switcher, or a MIDI interface from a computer) to the MIDI IN input of the device that will receive the message (a pedal, a sound generator, etc.) using a MIDI cable. Also, ensure that the transmitter and the receiver are set to the same MIDI channel.

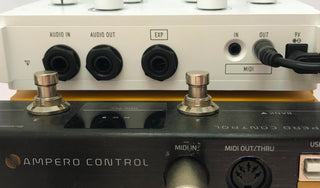
Fig. example of a MIDI controller: Ik Multimedia Irig for sending MIDI from a PC, Ampero Hotone MIDI switcher for direct connection to a pedal board.
Computer - USB- MIDI card - MIDI - pedal
Ampero - MIDI - pedal
How does it work then?
Let's take the example of a MIDI switcher connected to a pedal.
Each preset on the pedal is numbered from 1 to 128 (and it's up to you to know which sound corresponds to each number 😊). For example, on the pedal, preset 2 is our clean boost sound, and preset 3 is the lead sound.
On the switcher, you can assign a MIDI Program Change message (MIDI PC) number to each footswitch. Let's assign program change 2 to button B, and program change 3 to button C.
When you press footswitch B, a MIDI program change message 2 is sent to the pedal, which loads preset 2, and you have a clean boost sound. Then, by pressing footswitch C, a program change message 3 is sent, and now you have your selected lead sound. It's still simple!
Easy to customize
What's particularly interesting about MIDI is that you can customize the MIDI assignments according to your needs. Just because your MIDI switcher has only 4 footswitches doesn't mean you're limited to using presets 1 to 4 on your pedal. For instance, let's say during a live performance, you no longer need the clean boost sound (preset 2) and the lead sound (preset 3) from your footswitch. Instead, you require a crunch sound, which is preset 27 on the pedal, and a high-gain sound, which is preset 39. In this case, you simply need to adjust the MIDI assignments on the switcher, assigning program changes 27 and 39 to footswitches A and B respectively, replacing 2 and 3 from the previous example.
On Kernom Pedals
Each Kernom pedal features 128 presets accessible via MIDI using Program Change messages (MIDI PC). (The internal preset is always assigned to program change number 1.)
To recall a MIDI preset remotely, simply send a program change on the same MIDI channel as the pedal at any time. Upon reception, the pedal will load the preset, and you'll automatically hear the sound corresponding to the saved settings.
To save a preset via MIDI, when you're satisfied with the knob settings, press and hold the ON/OFF footswitch until the preset LED starts blinking blue. This indicates that the pedal is awaiting a Program Change message (MIDI PC) with the preset number you want to save the settings. If you then send a Program Change 3 from your switcher, the pedal will save the settings to preset 3 and return to manual mode. At any point thereafter, upon receiving a Program Change 3, you'll retrieve the corresponding sound.

by Antoine Petroff
Antoine is a seasoned audio, electronics and acoustics engineer with 20 years of experience both in the studio and in the lab working on high end audio products. He also plays keyboard and guitar and therefore has both a deep technical and artistic understanding of today’s musicians’ needs.


